- Table of Contents
-
- H3C Campus Fixed-Port Switches Web-Based Quick Start Configuration Guide-6W100
- 01-Compatible Product Models
- 02-Configuring Web Login with the Default IP
- 03-Web Login to a Device Without a Default IP
- 04-Interface Settings
- 05-PoE
- 06-VLAN
- 07-DHCP Server
- 08-DHCP Relay Agent
- 09-Static Routing
- 10-Policy-Based Routing
- 11-Ethernet Link Aggregation
- 12-Port Mirroring
- 13-Packet Filtering
- 14-Interface Rate Limit
- 15-Traffic Constrain
- 16-Spanning Tree
- 17-Direct Portal Authentication
- 18-Port Security
- 19-Port Isolation
- 20-ARP Attack Protection
- 21-Configuring a Static ARP Entry
- 22-IGMP Snooping
- 23-Enabling IPSG on an Interface
- 24-Software Upgrade
- 25-Adding Administrator Accounts
- 26-Ping and Tracert
- 27-Password Change
- 28-System Time
- 29-System Log
- 30-Configuration Backup, Export, Restoration to Factory Default
- 31-Device Reboot
- 32-Small-Sized Campus Network Configuration Guide
- Related Documents
-
28-System Time
| Title | Size | Download |
|---|---|---|
| 28-System Time | 182.02 KB |
System Time Quick Start Configuration Guide
Restrictions and guidelines
You are required to configure daylight saving time only for countries or regions that use daylight saving time.
Procedures
Assigning IP addresses to the network interfaces
Details not shown.
Configuring the system time
1. From the left navigation pane, select Device > Maintenance > Settings.
2. Click the Expand icon ![]() to the left of the Date
& Time title to
configure the system date and
time.
to the left of the Date
& Time title to
configure the system date and
time.
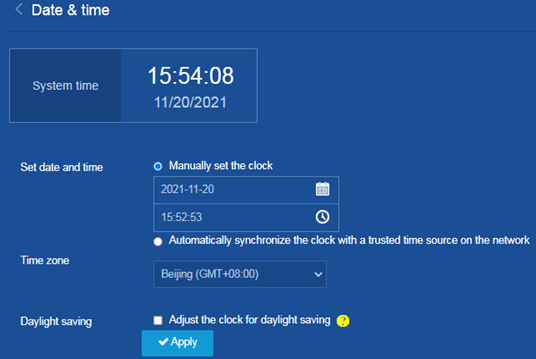
b. Select Manually set the clock to set the system date and time manually.
c. Click the ![]() icon
to set the date.
icon
to set the date.
d. Click the ![]() icon
to set the time.
icon
to set the time.
Figure 1 Setting the system date and time manually
d. Select the time zone.
e. (Optional.) Select Adjust the clock for daylight saving and then set the start and end date and time for daylight saving time.
Figure 2 Adjusting the clock for daylight saving
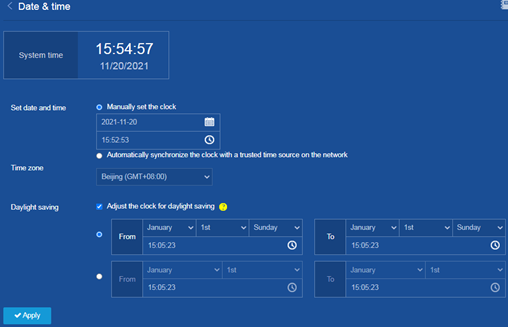
f. Click Apply.
