- Table of Contents
-
- H3C MSR Routers Configuration Examples(Web)-R6728-6W100
- 00-Preface
- 01-Web login Configuraiton Examples
- 02-Administrator Account Configuration Examples
- 03-Static Routing Configuration Examples
- 04-Cloud Connection Configuration Examples
- 05-Software Upgrade Examples
- 06-Port Mapping Configuration Examples
- 07-IPsec VPN Configuration Examples
- 08-L2TP VPN Configuration Examples
- 09-WLAN AC Configuration Examples
- Related Documents
-
| Title | Size | Download |
|---|---|---|
| 02-Administrator Account Configuration Examples | 81.77 KB |
Introduction
The following information provides an example of configuring administrator accounts.
Prerequisites
This document is not restricted to specific software or hardware versions. Procedures and information in the examples might be slightly different depending on the software or hardware version of the device.
The configuration examples were created and verified in a lab environment, and all the devices were started with the factory default configuration. When you are working on a live network, make sure you understand the potential impact of every command on your network.
The following information is provided based on the assumption that you have basic knowledge of administrators and remote management.
Software version used
This configuration example was created and verified on Release 6728P19 of the MSR830-10HI router.
Example: Configuring administrator accounts
Network configuration
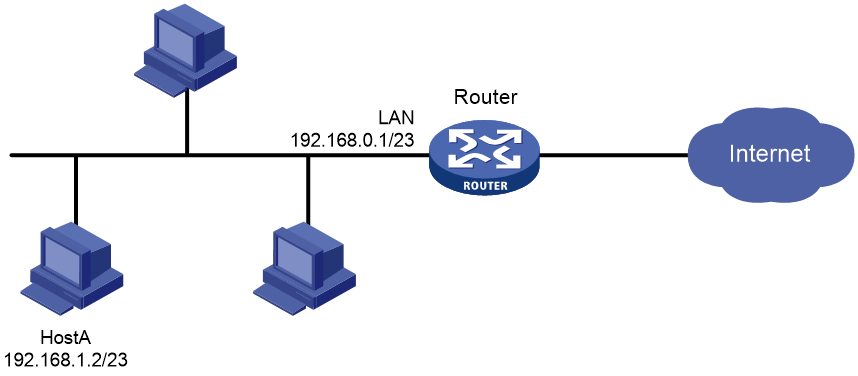
As shown in Figure 1, by default, all PCs connected to the LAN interface (VLAN-interface 1) can use the admin account to log in to the Web interface of the device. Configure the following settings for management:
· Add a new administrator account with the username webuser and password router123456, and delete the default administrator admin.
· Permit only Host A connected to the LAN interface to access the Web interface of the device.
Procedures
Adding an administrator account
This example adds a new administrator with the username webuser and password router123456 as follows:
1. Log in to the Web interface of the device.
2. From the navigation pane, select System Tool > Admin Accounts.
3. Click Add.
4. Add an administrator account:
a. Specify webuser as the username.
b. Specify router123456 as the password.
c. Enter router123456 for the Confirm password field again..
d. Select Administrator from the User roles list.
e. Select WEB for the Permitted access types field.
f. Click Apply.
Figure 2 Adding an administrator account
Deleting the default administrator
1. From the navigation pane, select System Tool > Admin Accounts.
2. In the Operation column for the admin account, click the delete icon.
3. In the dialog box that opens, click Yes.
Configuring the management IP address
This example permits only the IP address of Host A, 192.168.1.2, to access the Web interface of the device. After the configuration, other IP addresses cannot access the Web interface.
To configure the management IP address:
1. Click the admin icon in the upper right corner of the Web interface, and then click Logout.
2. In the dialog box that opens, click Yes.
3. Use the new username and password to log in to the Web interface.
4. From the navigation pane, select System Tool > Remote Login.
5. Click the HTTP/HTTPS tab.
6. Click Add.
7. Delete the default IP address range 192.168.1.2-192.168.1.254 that can log in to the Web interface previously.
8. Enter the IP address of Host A, 192.168.1.2, for the IP Address field.
9. Click àà to submit the configuration.
10. Click Apply.
Figure 3 Editing the management IP address
Verifying the configuration
You can log in to the Web interface of the device only by using username webuser and password router123456 on Host A with IP address 192.168.1.2/23.


