- Table of Contents
- Related Documents
-
| Title | Size | Download |
|---|---|---|
| 00-Overview | 358.00 KB |
Log in to the Web interface
Web browser requirements
As a best practice, use the following Web browsers:
· Google Chrome 40 or higher.
· Mozilla Firefox 19 or higher.
· Internet Explorer 10 or higher.
To access the Web interface, you must use the following browser settings:
· Accept the first-party cookies (cookies from the site you are accessing).
· To ensure correct display of webpage contents after software upgrade or downgrade, clear data cached by the browser before you log in.
· Enable active scripting or JavaScript, depending on the Web browser.
· If you are using a Microsoft Internet Explorer browser, you must enable the following security settings:
¡ Run ActiveX controls and plug-ins.
¡ Script ActiveX controls marked safe for scripting.
Log in to the Web interface for the first time
|
|
As a best practice, change the login password after the first successful login for security purposes. |
The device supports user login through HTTP and HTTPS. By default, HTTPS is enabled.
Use the following default settings for the first login.
|
Item |
Setting |
|
IP address of the device management interface |
192.168.0.1/24 |
|
Username |
admin |
|
Password |
admin |
|
User role |
network-admin |
To log in to the Web interface:
1. Use an Ethernet cable to connect the configuration terminal to an Ethernet port on the device.
2. Assign the login host an IP address in the same subnet as the device.
3. Open the browser, and then enter login information:
a. In the address bar, enter the IP address of the device https://192.168.0.1.
b. On the login page, enter the default username (admin) and password (admin).
c. Click Login.
4. Change the login information:
¡ To change the device IPv4 address, go to the Network > IPv4 > IPv4 Addresses page.
¡ To change the password of the login user (admin at the first login), click the Admin icon ![]() .
.
¡ To add new user accounts and assign access permissions to different users, go to the System > Administrators > Administrators page.
Log out of the Web interface
|
|
· For security purposes, log out of the Web interface immediately after you finish your tasks. · You cannot log out by directly closing the browser. · The device does not automatically save the configuration when you log out of the Web interface. To prevent the loss of configuration when the device reboots, you must save the configuration. |
1. Use one of the following methods to save the current configuration.
¡ Click the ![]() icon.
icon.
¡ Go to the System > Maintenance > Configuration Management page to save the configuration.
2. Click Logout icon ![]() in the upper-right corner of the Web interface.
in the upper-right corner of the Web interface.
Use the Web interface
Web interface layout
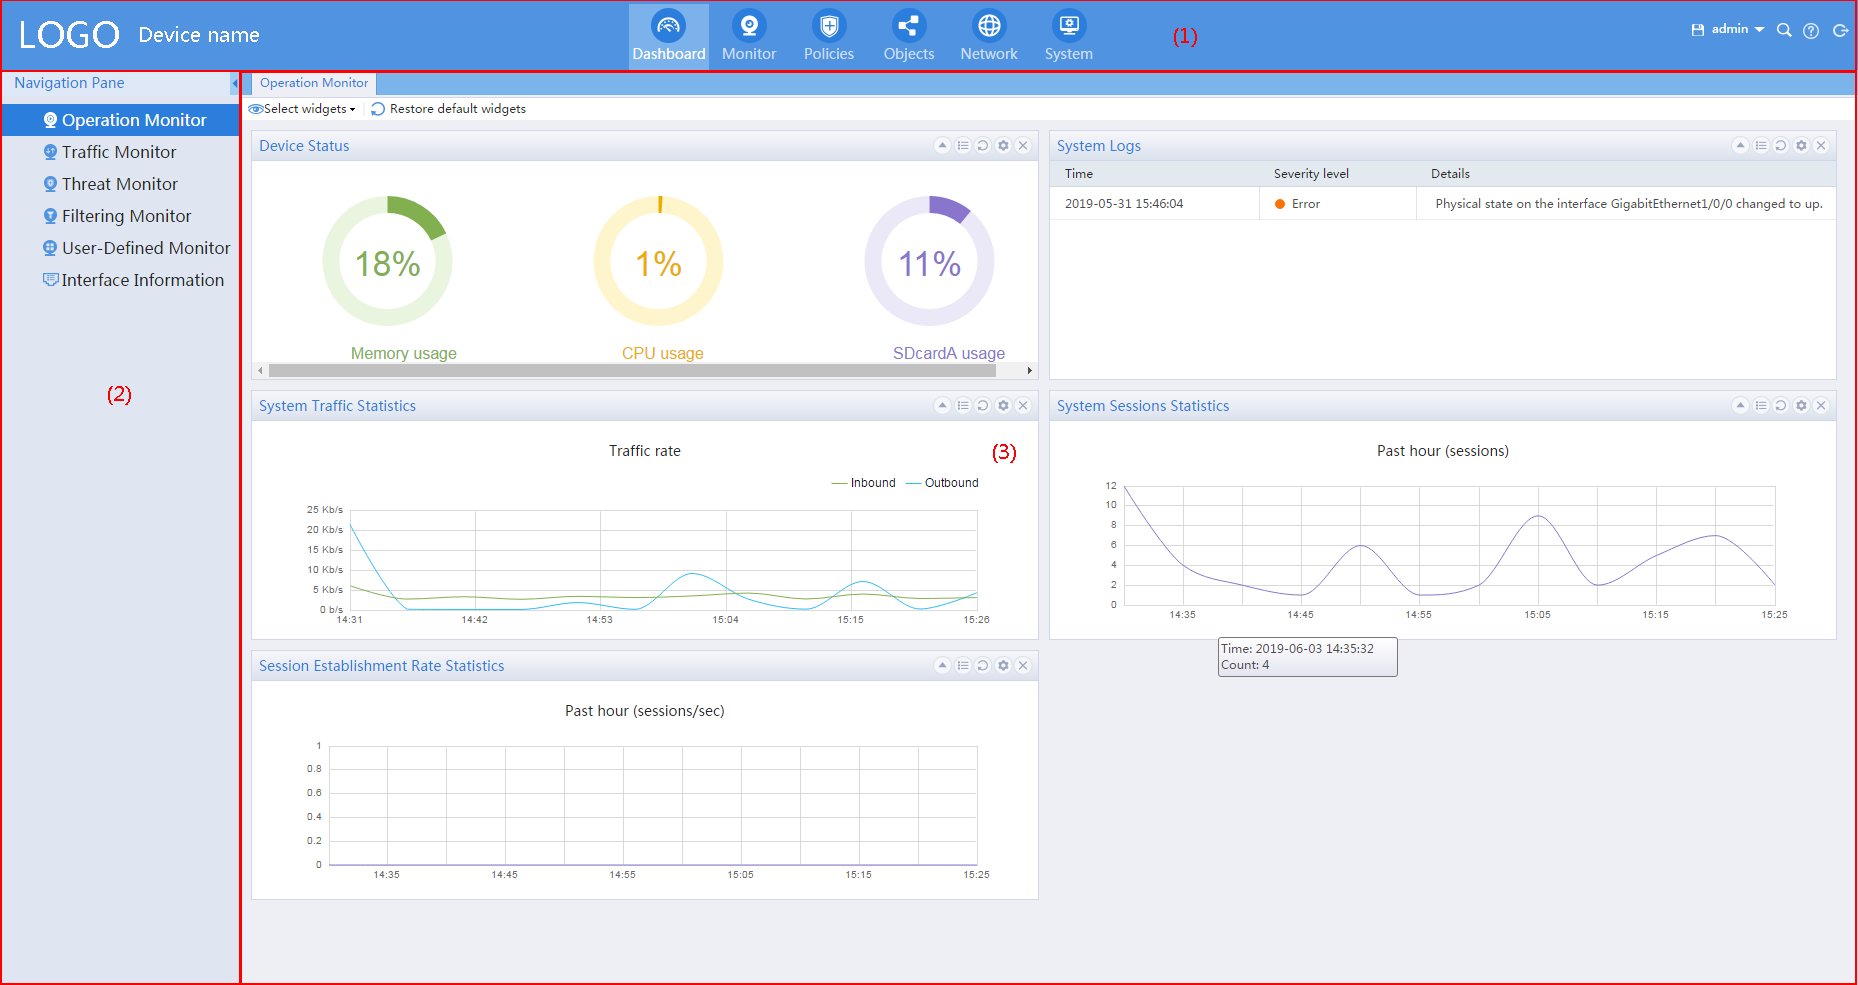
|
2) Navigation pane |
3) Work pane |
As shown in Figure 1, the Web interface contains the following areas:
|
Area |
Description |
|
(1) Banner and admin section |
Contains the following items: · Basic information, including the company logo, device name, and information about the current login user. · Basic management icons: ¡ Admin icon ¡ Save icon ¡ Help icon ¡ Logout icon |
|
(2) Navigation pane |
Contains menus of all features and functionalities. |
|
(3) Wok pane |
Displays information and provides an area for you to configure features. Depending on the content in this pane, the webpages include the following types: · Table page—Displays entries in a table (see "Use a table page"). · Configuration page—Contains parameters for you to configure a feature or function (see "Use a configuration page"). |
Types of webpages
Webpages include table and configuration pages. This section provides basic information about these pages.
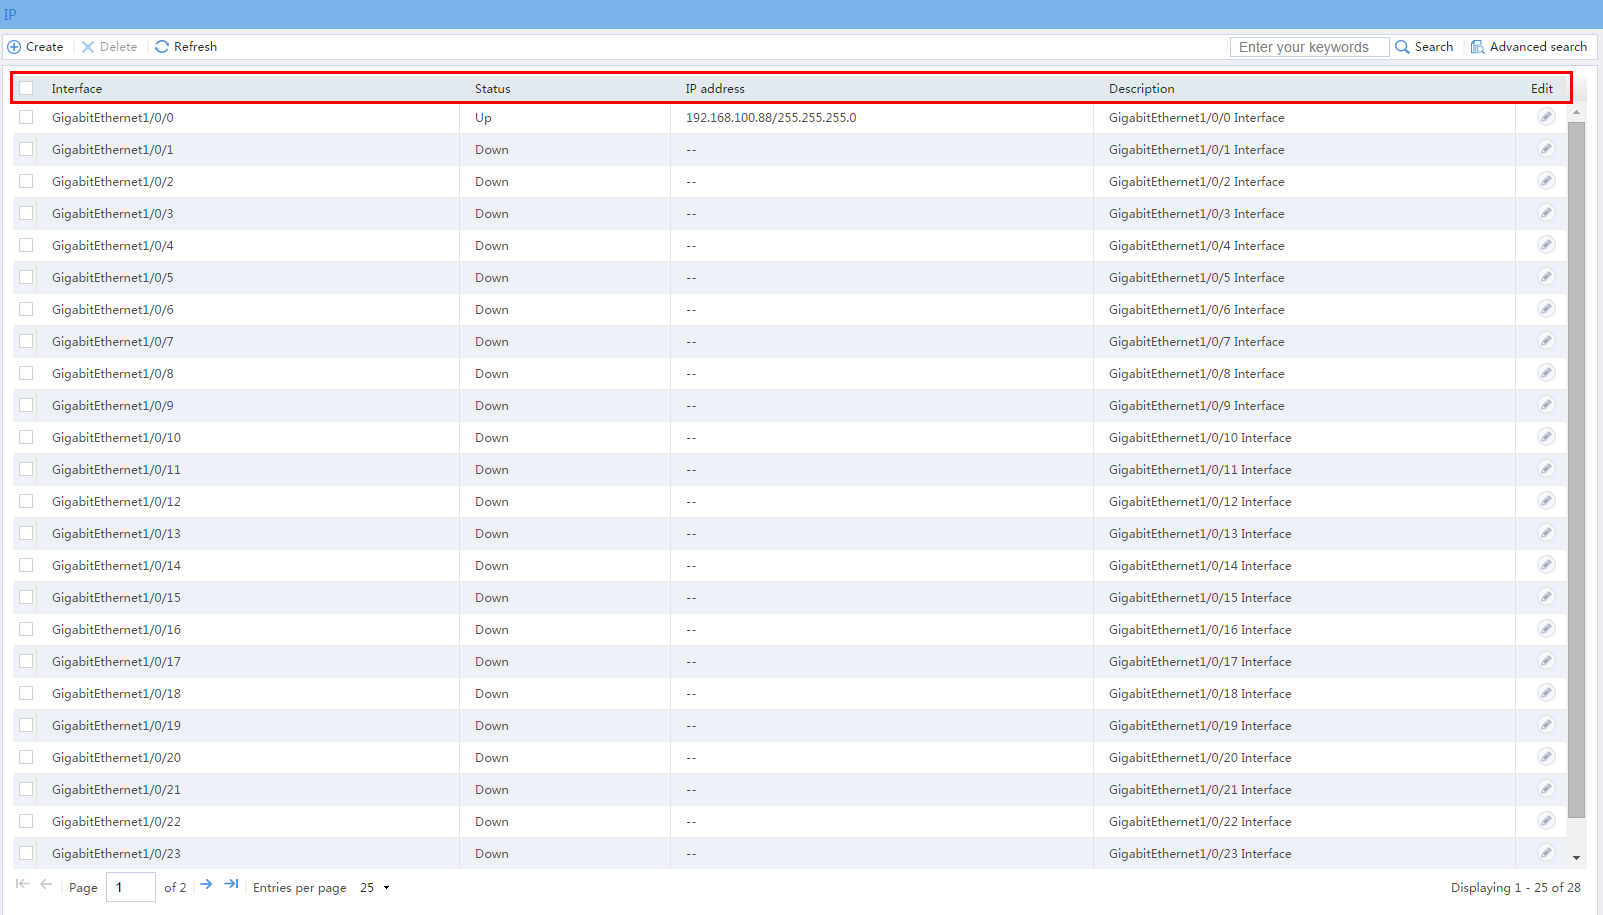
Use a table page
As shown in Figure 2, a table page displays entries in a table. To sort entries by a field in ascending or descending order, click the field. For example, click Interface to sort entries by interface.
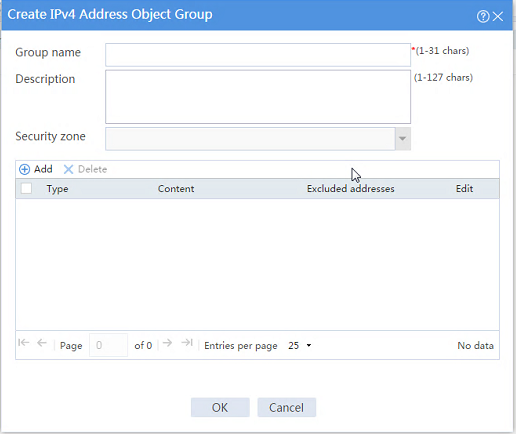
Use a configuration page
As shown in Figure 3, one configuration page contains all parameters for a configuration task. If a parameter must be configured on another page, the configuration page typically provides a link. You do not need to navigate to the destination page.
Figure 3 Sample configuration page
Perform basic tasks
This section describes the basic tasks that must be frequently performed when you configure or manage the device.
Save the configuration
Typically, settings take effect immediately after you create them. However, the system does not automatically save the settings to the configuration file. They are lost when the device reboots.
To prevent settings from being lost, use one of the following methods to save the configuration:
· Click the ![]() icon.
icon.
· Go to the System > Maintenance > Configuration Management page, and then click Save running configuration.
Reboot the device
Reboot is required for some settings (for example, IRF) to take effect.
To reboot the device:
1. Save the configuration.
2. Click the System tab.
3. In the navigation pane, select Maintenance > Reboot.
The Reboot page opens.
4. Click Reboot.
Feature navigator
Menu items and icons available to you depend on the user roles you have. By default, you can use any user roles to display information. To configure features, you must have the network-admin or context-admin user role.
The top-level menu for users logged in with the network-admin or context-admin user role includes Dashboard, Monitor, Policies, Objects, Network, and System. For each top menu, a navigator table is provided. Use the navigator tables to navigate to the pages for the tasks you want to perform.
For example:
· To change the default device name, go to the System > Maintenance > Settings > Device Info page.
· To delete an IPv4 ACL, go to the Objects > ACLs > IPv4 ACLs page.
