- Table of Contents
- Related Documents
-
| Title | Size | Download |
|---|---|---|
| 01-Text | 780.61 KB |
About the H3C Cloudnet
H3C Cloudnet is a light-weight multiservice platform that provides scenario-based solutions, including site deployment, device monitoring, WLAN O&M, data connection and application for small and medium-sized enterprise office and business networks, and branch chain scenarios.
Agile deployment procedure
If you are familiar with the basic concepts of branches, nodes, sites, devices, and accounts in the Cloudnet, perform the following procedure to complete agile deployment:
Restrictions and guidelines
· Some features in this document are restricted only to China mainland.
· After deploying the Cloudnet, you can view and configure other features of the Cloudnet. For more information about Cloudnet authentication, see H3C Cloudnet Authentication User Guide. For more information about the features available in the Cloudnet, see H3C Cloudnet Feature Guide.
Register an account
About Cloudnet accounts
The Cloudnet provides three levels of accounts: tenants (parent accounts), level-1 subaccounts, and level-2 subaccounts. A parent account has the highest permissions. For a subaccount, the supported Cloudnet features are determined by its role and the manageable branches and sites are authorized by its parent account.
After registration, you can use the parent account or a subaccount to log in to the Cloudnet. For more information about subaccounts, see "Manage subaccounts" in H3C Cloudnet Feature Guide.
Procedure
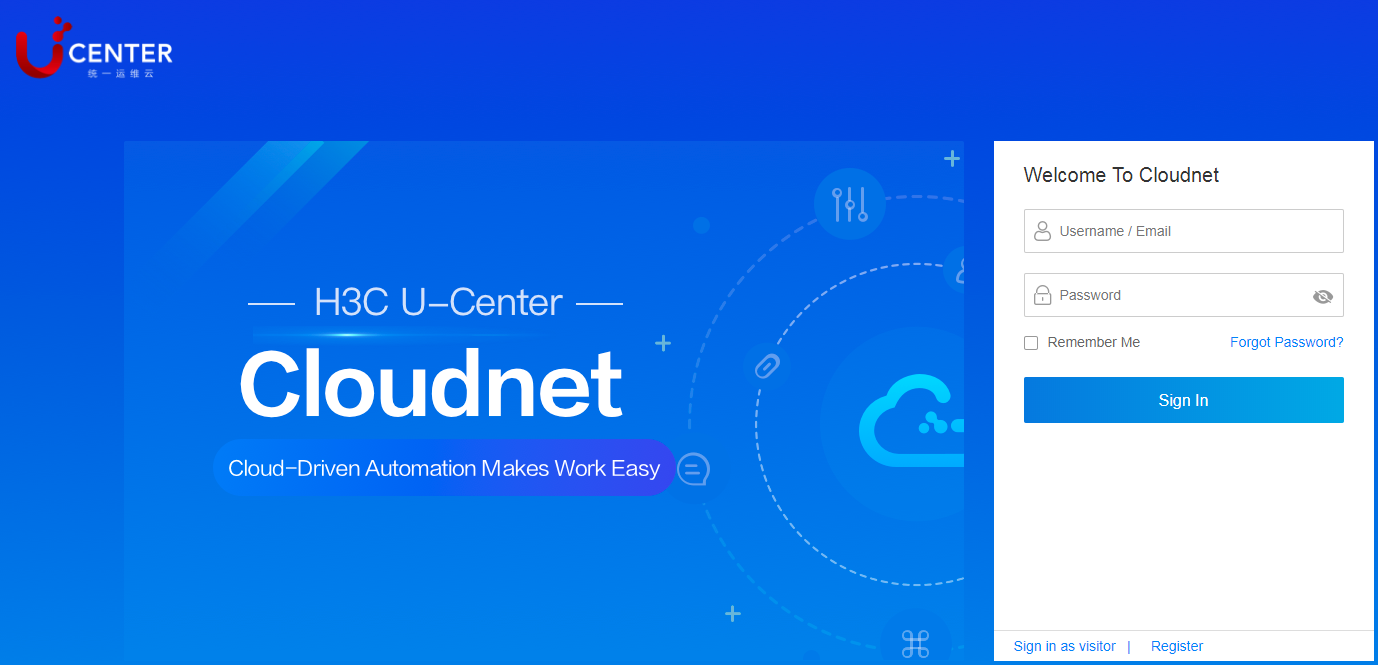
1. Access the H3C Cloudnet at http://oasiscloud.h3c.com, and then click Register.
Figure 1 Accessing the Cloudnet
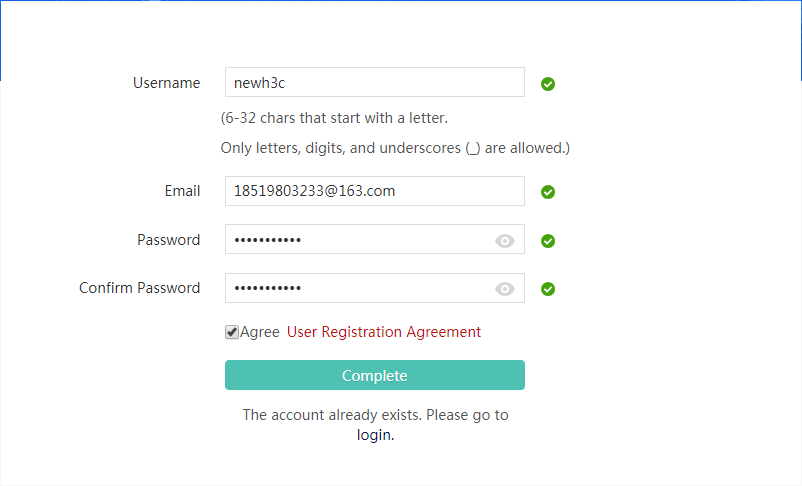
2. Fill in information as required.
Figure 2 Registering an account
Log in to the Cloudnet
Access the H3C Cloudnet at http://oasiscloud.h3c.com, enter the username and password, and then click Login. You are placed on the home page of the Cloudnet.
The following is the webpage layout of the H3C Cloudnet:
Figure 3 Webpage layout
|
(1) Grid menu |
(2) Scenario menu |
(3) Navigation pane |
|
(4) Administrative section |
(5) Work pane |
|
· Grid menu—Contains functionality categories. If you click a category, the navigation pane displays all features and functionalities of that category.
· Scenario menu—Allows you to select sites or branches as needed.
· Navigation pane—Contains menus of all features and functionalities. If you select one menu item, the right panel section displays the work pane for that item.
· Administrative section—Contains the link to add sites and devices and to access system notifications, language settings, and login account information.
· Work pane—Provides an area for you to manage, configure, and monitor the
system, features, and services depending on the menu item you select in the
navigation pane. This area also allows you to toggle
among tile ![]() and list
and list ![]() views
as needed.
views
as needed.
Manage branches and sites
About branches and sites
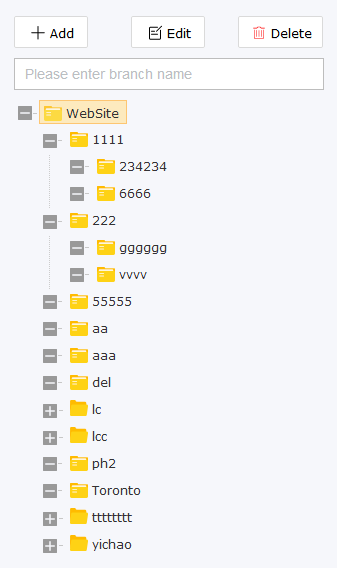
In the Cloudnet, a branch contains multiple sites. The number of sites in a branch is not limited. You can classify branches by region, brand, or relation.
Figure 4 Branch classification
A site, except in a converged scenario, can contain only devices of the same type. For example, you can only add access controller products to the AC+fit AP scenario only. The number of devices in a site is not limited.
Restrictions and guidelines
To delete a branch that contains a subordinate branch or site, first delete the subordinate branch or site.
To add a site quickly, click the Add icon ![]() in the administrative
section and then select Site.
in the administrative
section and then select Site.
Procedure
1. On the top navigation bar, click Network.
2. To rename a root branch node, perform the following steps:
a. From the left navigation pane, select Network > Organization.
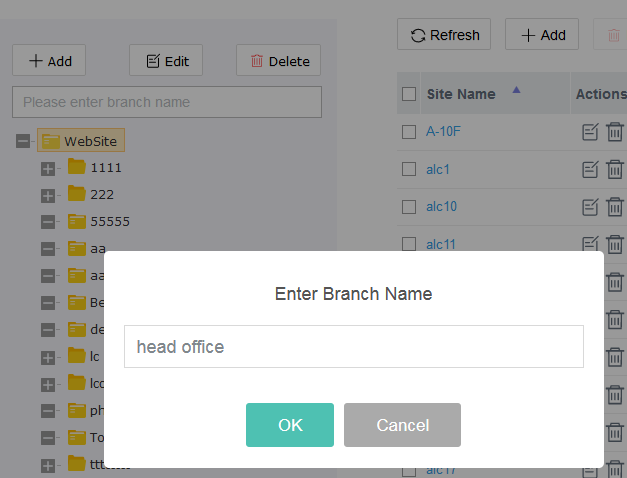
b. Select root branch node Website and then click Edit to rename the root branch node as head office.
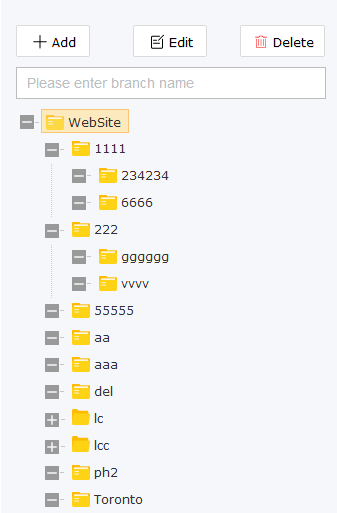
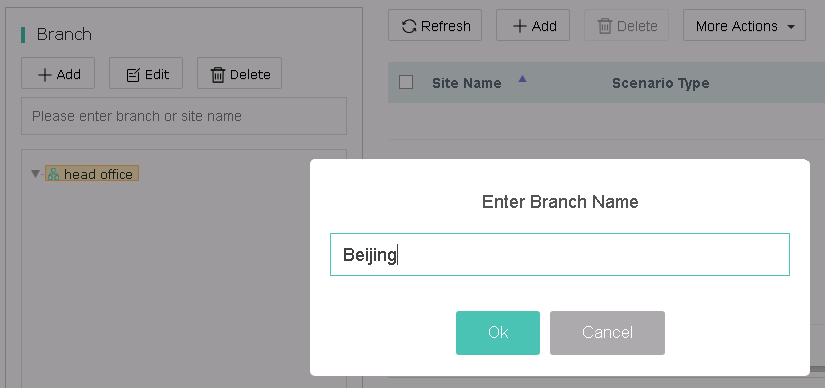
3. To add a branch, select root node head office, click Add, and then enter a branch named Beijing.
Figure 7 Adding a branch
4. To delete a branch, select the branch and then click Delete. The root branch node cannot be deleted.
5. To add a site, perform the following steps:
a. From the left navigation pane, select Network > Dashboard.
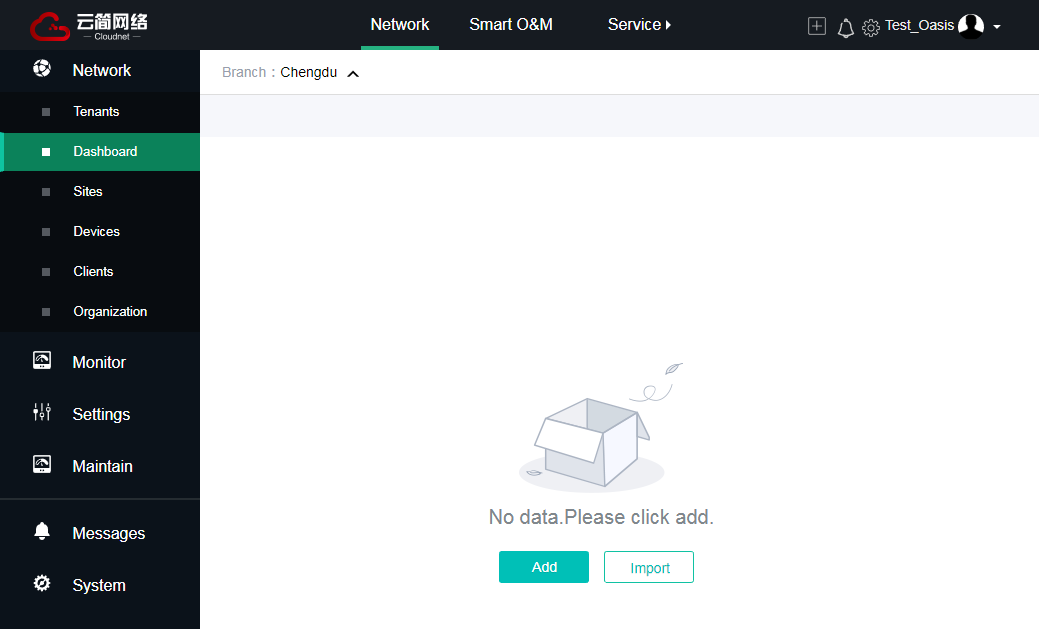
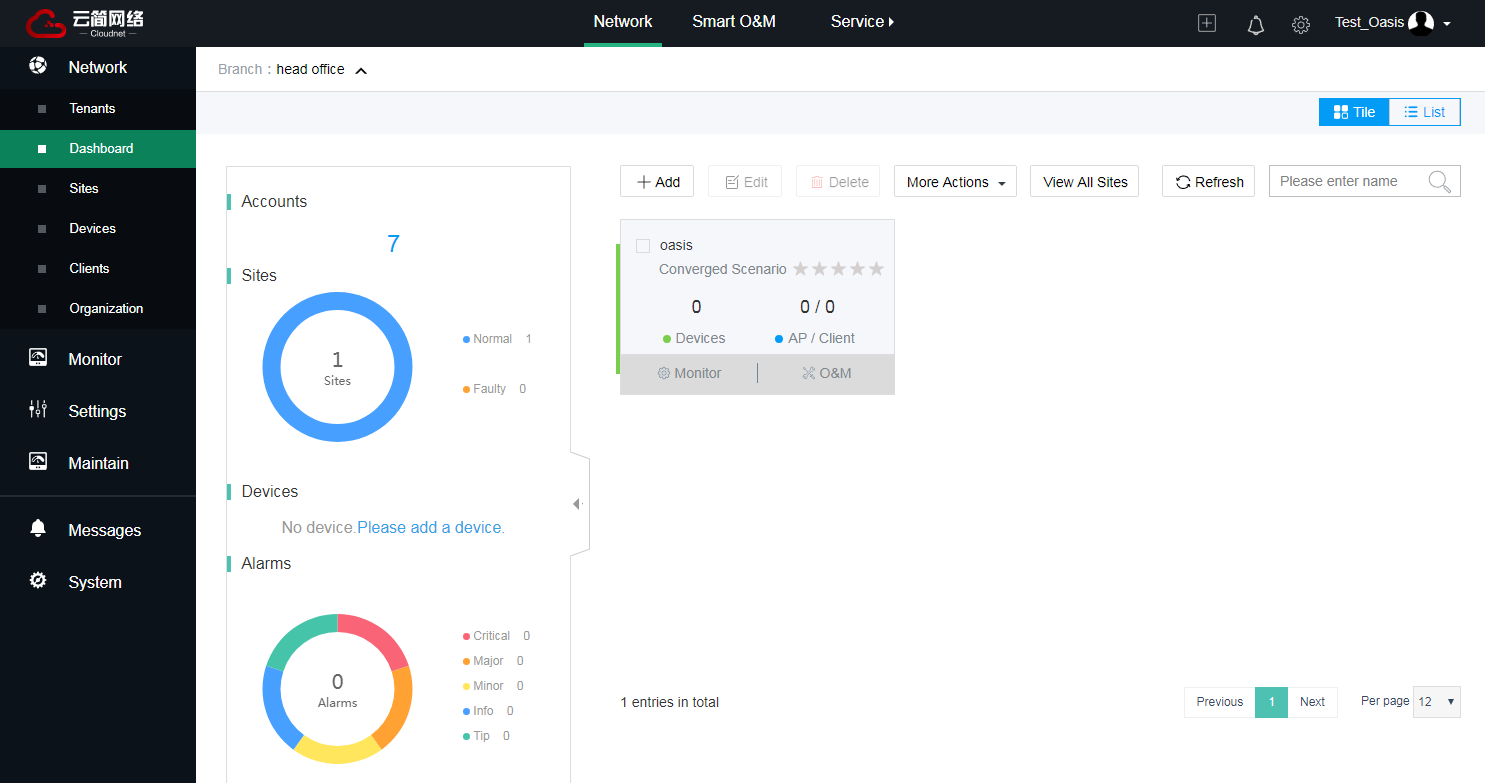
b. If it is the first time you add a site, click Add. If a site already exists, click Add in the site list area to the right of the page. Click OK.
Figure 8 Adding a site for the first time
Figure 9 Adding a site when a site already exists
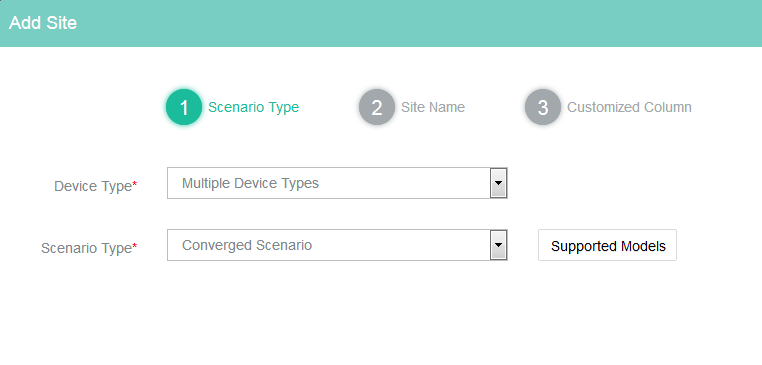
c. Specify a scenario type according to the device type and then click Next.
- Only the converged scenario is available.
- To view the supported device models, click Supported Models next to the Scenario Type field.
Figure 10 Specifying a scenario type
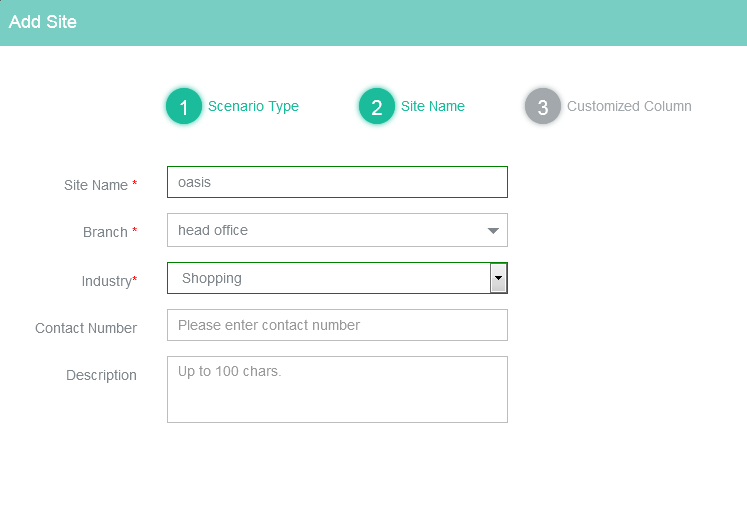
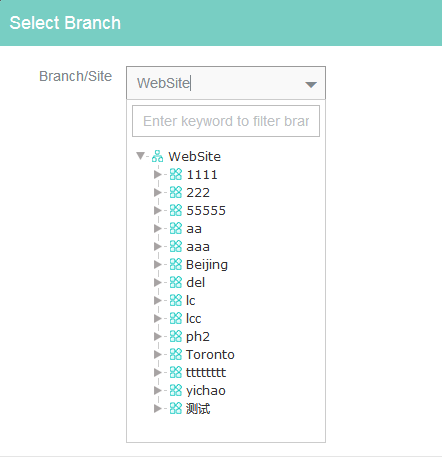
d. Select head office from the Branch list.
Figure 11 Specifying a site name
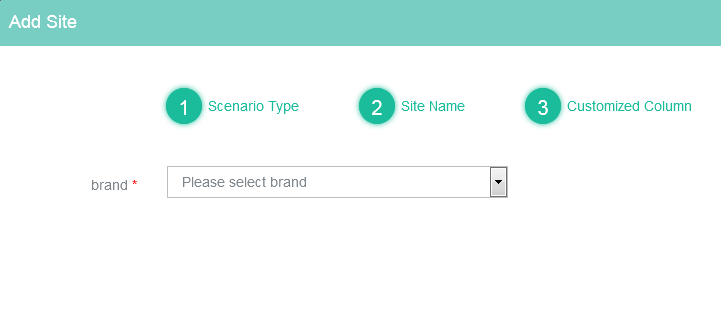
e. Select a brand, and then click OK.
Figure 12 Selecting a brand
6. To delete a site, select the site and then click Delete.
Export sites
To back up all sites of the current Cloudnet account, perform this task to export site information. The exported site list will be saved to the default downloading folder in the browser.
Procedure
1. On the top navigation bar, click Network.
You are placed on the Dashboard page.
2. Select a branch or site from the scenario menu.
3. Click More Actions and then select Export.
Figure 13 Exporting sites
Import sites
1. On the top navigation bar, click Network.
You are placed on the Dashboard page.
2. Click More Actions and then select Import.
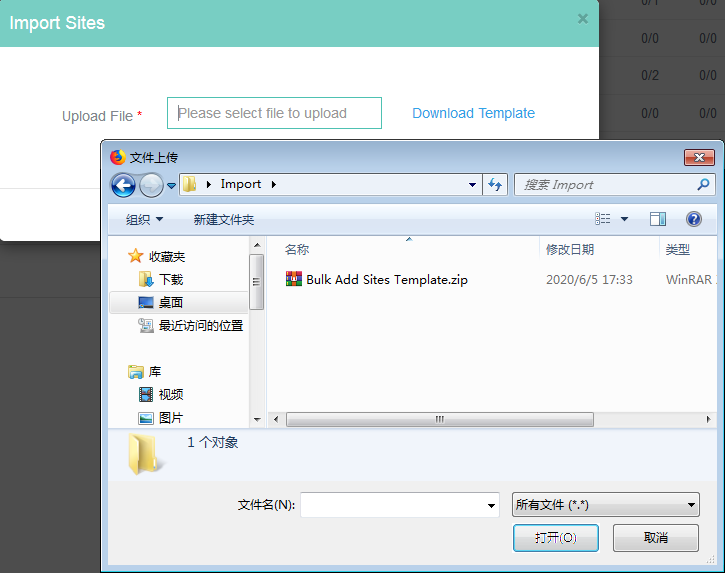
3. Click the Download Template link.
4. Fill in the template file as needed.
5. Click the Upload File field to select the template file, and then click OK.
Figure 14 Importing sites
Configure a site label
Perform this task to distinguish among different sites.
Restrictions and guidelines
Only tenants can configure a site label.
The number of site labels cannot exceed 10.
Procedure
1. On the top navigation bar, click Network.
You are placed on the Dashboard page.
2. Click More Actions and then select Manage Site Labels.
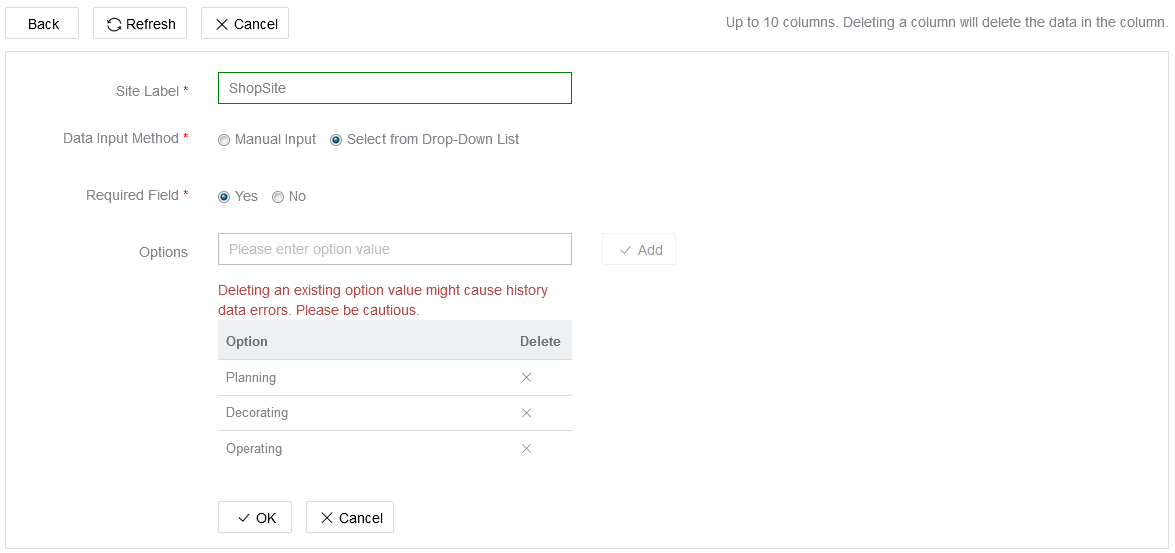
3. Click Add, enter the required information, and then click OK.
If you select Select from Drop-down List from the Data Input Method field, you must select option values from the Options field.
Figure 15 Adding a site label
4. To edit a site label, click the Edit button ![]() for the target site label.
for the target site label.
5. To delete a site label, click the Delete button ![]() for the target site label.
for the target site label.
Deleting a site label will delete the records saved for the site label in all sites of the account. Please be cautious.
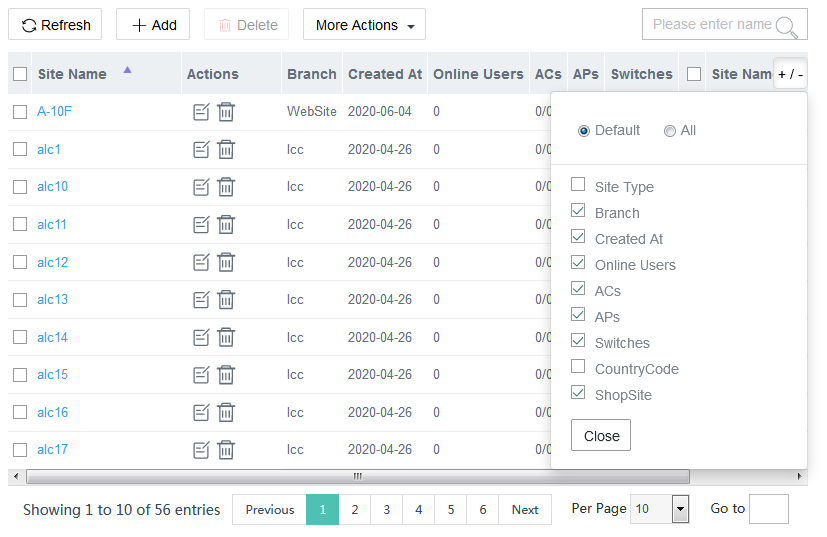
6. To view site label information, click the Columns icon ![]() .
.
Figure 16 Viewing the site label
7. To add a site label for an existing site, click the Edit button ![]() for the site.
for the site.
Configure devices
Add a device
Prerequisites
Before adding a device to the Cloudnet, perform the following tasks:
· Make sure the device can access the Internet.
· Make sure the device can resolve the Cloudnet server address.
· Execute the cloud-management server domain oasiscloud.h3c.com command on the device to connect the device to the Cloudnet.
Restrictions and guidelines
To add a site quickly, click the Add icon ![]() in the administrative
section and then select Device.
in the administrative
section and then select Device.
If you fail to add a device to the Cloudnet because it has been added to the Cloudnet by other accounts, first unbind the device from the Cloudnet. For more information about device unbinding, see "Unbind a device."
Procedure
1. On the top navigation bar, click Network.
2. From the left navigation pane, select Network > Devices.
3. Click Add.
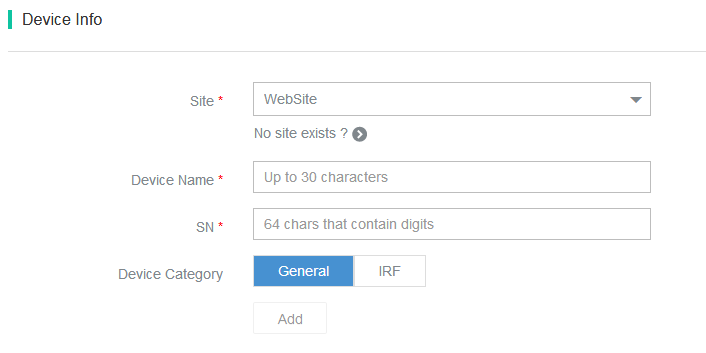
4. Select a site, and enter a device name and serial number.
To add an IRF device, select IRF from the Device Category field.
Figure 17 Adding a device
Manage a device
Perform this task to edit the device name, delete the devices in bulk or view device information.
Procedure
1. On the top navigation bar, click Network.
2. From the left navigation pane, select Network > Devices.
3. From the scenario menu, select a site or all sites of a branch.
4. To delete one or more devices, select target devices and then click Delete.
Deleting a device from a site will delete the device data stored in the Cloudnet but will not delete the settings on the device.
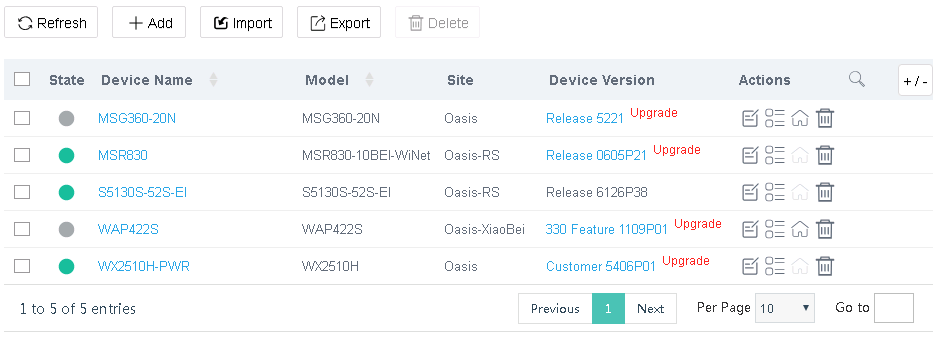
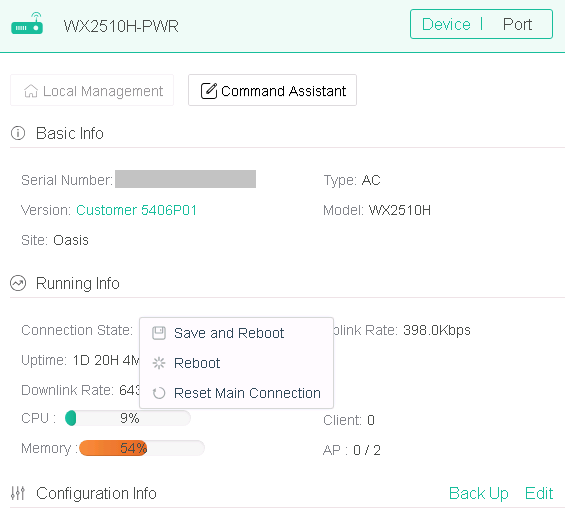
5. To view basic information, port information, and running information for a device, click the name of the device.
6. On the page that opens, perform the following tasks:
a. To perform basic operations such as restart, upgrade, and save configuration on the device, click the corresponding icon.
b. To perform local management for the device, click Local Management.
Only online devices support local management.
c. To view detailed information about the device, click the Details tab on the page.
Figure 18 Managing a device
Figure 19 Viewing device information
Export devices
To back up information about devices connected to the Cloudnet, perform this task to export device information. The exported device information will be saved to the default downloading folder specified in the browser.
Procedure
1. On the top navigation bar, click Network.
2. From the left navigation pane, select Network > Devices.
3. Click More and then select Export.
4. Select a branch and then click OK.
All devices in the branch will be exported.
Figure 20 Exporting devices
Import devices
1. On the top navigation bar, click Network.
2. From the left navigation pane, select Network > Devices.
3. Click More and then select Import.
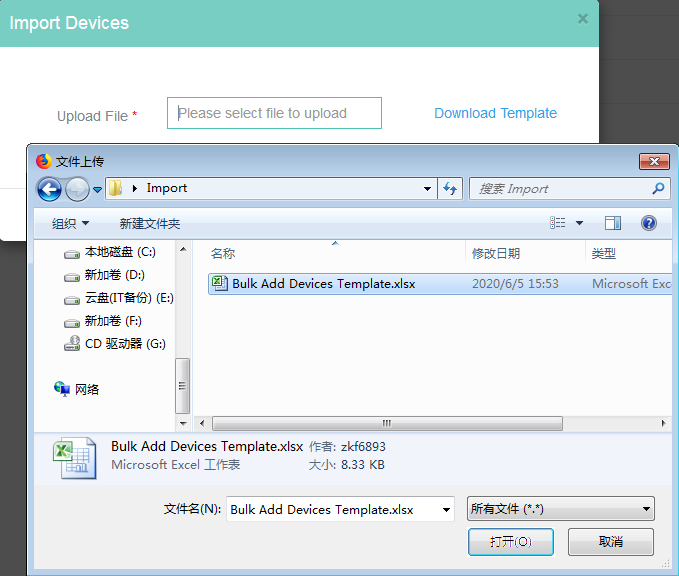
4. Click the Download Template link.
5. Fill in the template file as needed.
6. Click the Upload File field to select the template file, and then click OK.
Figure 21 Importing devices
Unbind a device
Restrictions and guidelines
Only ACs of 5420 or later, routers, and specific Cloud APs support device unbinding.
Only tenants can unbind devices form the Cloudnet. A tenant can perform up to five unbind operations in a day.
If you fail to add a device to the Cloudnet because it has been added to the Cloudnet by other accounts, first unbind the device.
Procedure
1. On the top navigation bar, click Network.
2. From the left navigation pane, select System > Device Unbinding.
3. On the page that opens, perform the following steps:
a. Enter the serial number of the device and copy the generated unbinding code (unbinding command).
b. Execute the command in system view from the CLI of the device.
c. Click Refresh to view the unbinding result on the page.
Figure 22 Unbinding a device from the Cloudnet


